
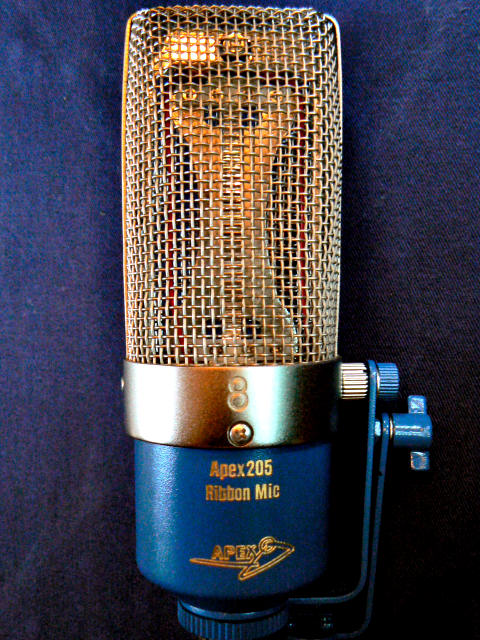
 I have two Apex 205 microphones, the cheap Chinese ribbon mics appearing in amateur mic collections everywhere. Even out of the box, these microphones (and the equivalent mics from Nady, Thomann, SM Pro, et. al.) sound decent. But a DIY’er can easily make 2 changes to improve the sound:
- Remove unnecessary screening from the mic
- Replace the transformer
I recently performed the first modification on one of my mics, and left the other mic alone with the intent of doing a real A/B comparison. That is, with both mics on the same sound source, at the same time. Here, I’ll walk you through the mod, before discussing the changes I found in the mic’s response. (Note: I plan on performing the second modification, for further comparison, in the future.)
Background
The ribbon in a ribbon mic damages easily. One errant wind blast is enough to stretch or tear the ribbon. So the manufacturers of these cheaper mics include extra wind screening to guard the ribbon, knowing that many buyers are first-time owners likely oblivious to the care a ribbon requires. However, if you understand the mic’s delicate requirements, you don’t really need all the extra screens, and their effect on the mic’s response.
Modding your mic
Removing the screening is straightforward. (And it’s the easier of the two mods mentioned above, as it requires no soldering.) You’ll need:
- A Philips head screwdriver
- A pair of pliers
- Possibly a pair of metal snips or wire cutters
- Optionally, some foam
- A clear work area
Step 1: Access the ribbon assembly
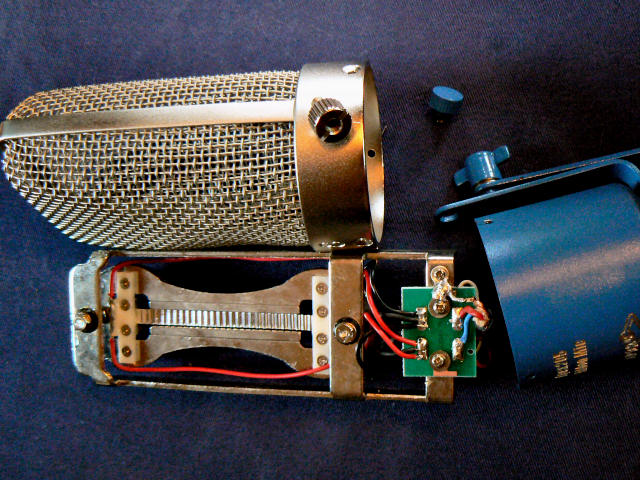
The Apex 205 has a 2-part casing: A mesh basket (the top) which houses the ribbon and ribbon motor, and a blue canister (the bottom) which houses the transformer and electronics.
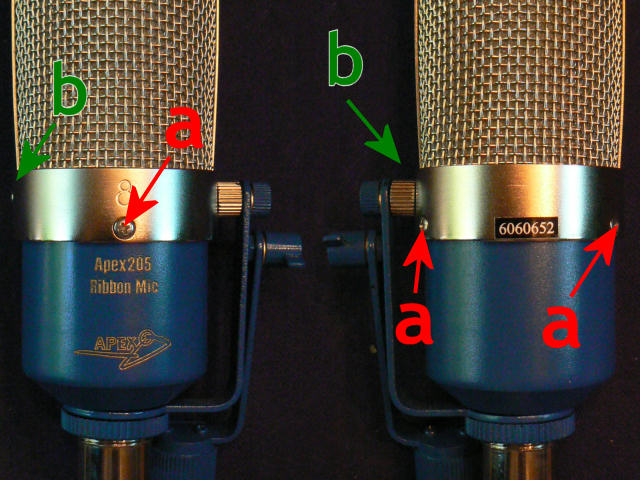
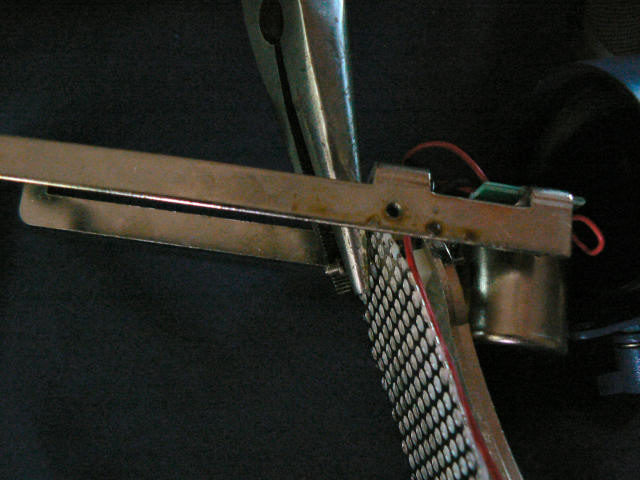
To disassemble the mic, first remove the 3 screws holding the mesh basket to the base – one under the engraved figure 8 and two on the back (marked “a” in the picture below. Click the image for a closer view.)
The ribbon housing is attached to the inside of the mesh basket by the remaining screw and the top of the mic stand mount. Unscrew both of these (marked “b”,) and you can remove the ribbon assembly from the case.
Step 2: Remove the wind shields
This step exposes the ribbon and magnet:
– Do not blow on the ribbon, or move the assembly too quickly through the air. The ribbon WILL tear.
– Do not perform the rest of this procedure near a fan or open window, for the same reason. This is not a joke. The ribbon is THAT SENSITIVE to moving air.
– The magnet in the ribbon motor is strong enough to attract loose screws, nuts, or even METAL FILINGS lying in your work area. Keep the area around the mic clear while you work.
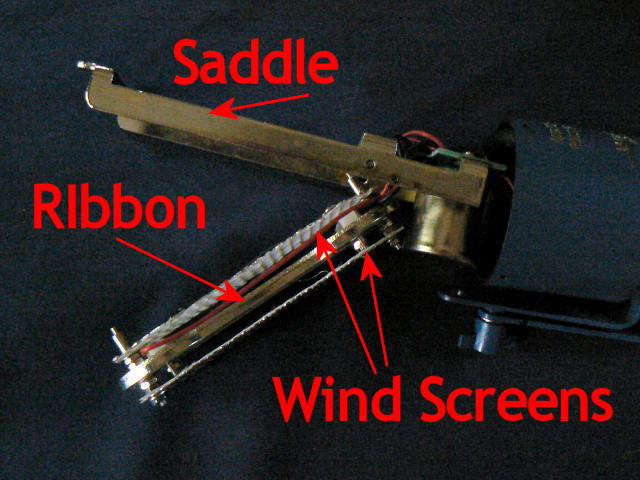
The ribbon assembly consists of 3 main parts: The saddle (my name for it) which is the metal frame to which the transformer is also attached; The wind shields, which you’ll be removing; and the ribbon motor.
There’s no trick to removing the shields. They’re attached to the ribbon assembly with a few small nuts which loosen easily (though may require gentle coaxing with needle nosed pliers to get them started.)
Working slowly so as not to agitate the ribbon, first remove the nuts that hold the ribbon motor to the saddle.
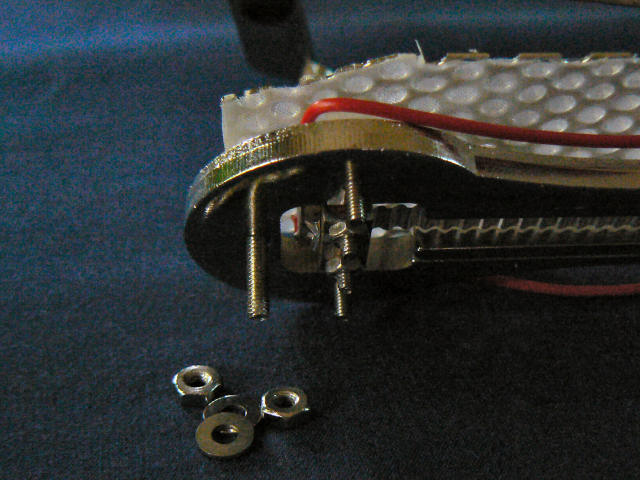
Then, remove the nuts that hold the screens in place, and slip the screens off the ribbon assembly.
You may need the pliers again to loosen the barrel nuts holding the top screen in place.
With the screens removed, you can reattach the ribbon motor to the saddle. (You don’t need to replace all the nuts that held the screens in place, though you can if you want.)
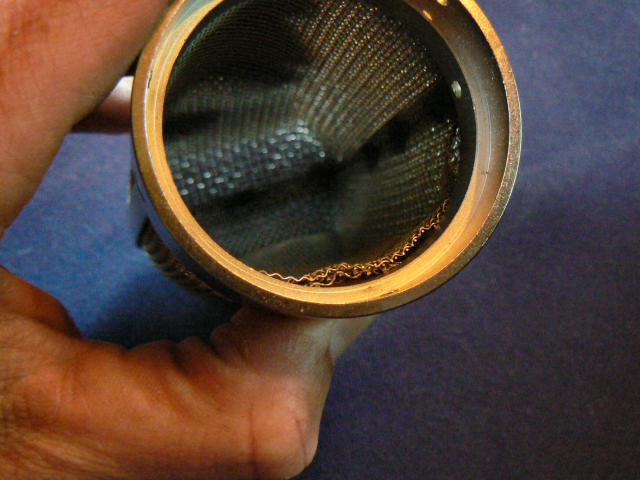
Step 3: Remove mesh screening
This step is a little trickier, and messier. Truthfully, I’m not convinced it’s necessary. I can’t tell the difference in sound between a 205 with and without the inner basket mesh. (Though this is not true for the wind screens, above. Those metal screens definitely affect the sound.) So if the sight of wire cutters in the picture below makes you anxious, you can skip this step.
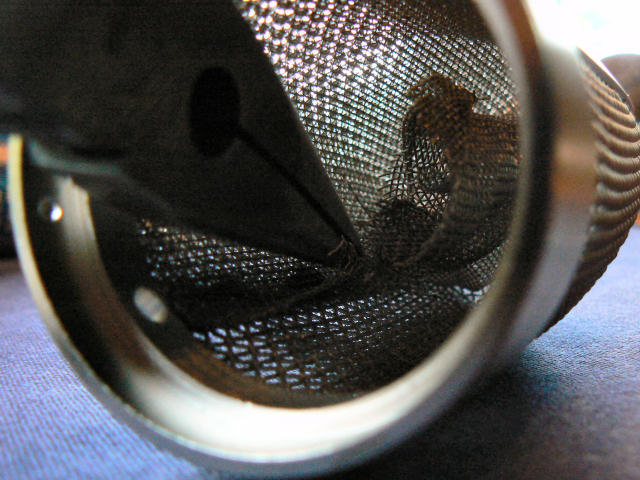
To remove the mesh, press gently on the outside of the basket just enough that the mesh comes away from the rim on the inside. Slip a screwdriver under the inner mesh and pry it away.
Depending on your mic, there may be two layers of mesh. You can remove one or both of these. (Again, in my experience, the choice makes minimal, if any, difference to the final sound of the mic.)
The mesh is affixed to the outer basket with epoxy, though how firmly differs from mic to mic. Sometimes both inner mesh screens peel off easily, sometimes you need some clipping to help them along.

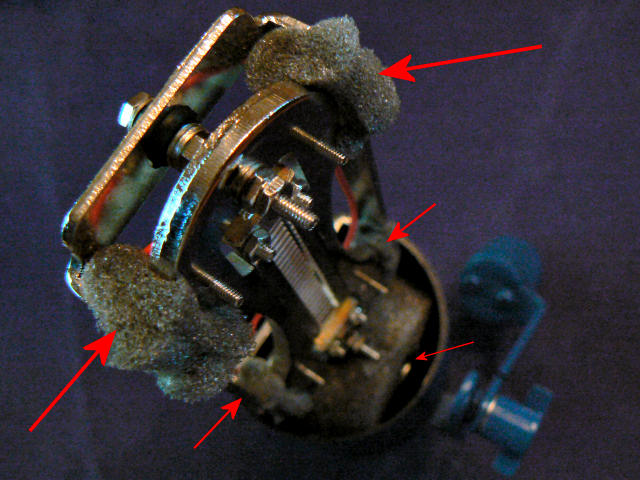
Step 4 (optional): Pad with foam
This step is optional, though in my opinion worthwhile. Using a loose foam, like the kind used to pack electronic devices, fill the spaces between the ribbon assembly and saddle, and the space around the transformer in the base canister. This should dampen the effect of mechanical vibrations, such as footfalls near the mic stand, and help reduce resonance in the canister.
Step 5: Reassemble
In case you’ve lost your orientation, the picture below shows the front face of each component. The saddle mounts, figure 8, and Apex logo should all line up.
Re-affix the basket to the saddle (the green “b” screws in the first image above,) then attached the basket to the base (the red “a” screws above.) And that’s it. Your mic is now ready!
Your newly modded microphone
The mic is good to go at this point. However, because you removed most of its built-in wind protection, you’ll need to take some new precautions:
- Avoid windy locations: You’ve had the mic apart, and seen how delicate the ribbon is. Image what a stiff gust of wind, or blast from a strong fan, would do to that now-unprotected ribbon.
- Use a pop screen as much as possible: Obviously, you’ll need a pop screen when recording vocals. But other instruments can generate blasts of air strong enough to damage the ribbon. In particular, the speaker motion from a loud guitar amp, especially on hard, sharp sound, moves enough air to tear the ribbon.
- Don’t move the mic too quickly: When transporting the mic, or moving it about your studio, don’t make abrupt movements. Better yet, keep the mic in its protective bag unless you’re recording.
And finally, the obligatory disclaimer: This will void your warranty, and you can destroy your microphone if you’re not careful, both while performing the modification and in regular use thereafter. I won’t be held responsible if you attempt this procedure on your microphone, and damage it. I’m happy to offer suggestions or assistance if you run into difficulties (leave a comment, or email me: des @ hometracked . com.) But what you do to your microphone is all on you.
Next: Audio samples comparing the modded and unmodded mics
For more DIY, microphone, and home recording tips,
Subscribe to the Hometracked feed, or receive email updates.
Tags: diy, microphones
14 comments
Trackback URI Comments feed for this article
As a fellow 205 owner, I can’t wait to hear the before & after samples. Great article Des!
Nicely detailed instructions and photos Des – especially helpful are your cautionary statements about potential ribbon damage.
The only minor details I would add would be a caveat to maintain the correct wiring phase if a new transformer is installed and to check and correct (if necessary) proper ribbon tension. 30% – 50% of the hundred or so Chinese ribbon mics I’ve seen have had ribbon so slack in the magnetic gap that about 80% of their length is sagging out of the magnet gap (reduces output level and introduces distortion and a mechanical “clanging”.
Best, Michael Joly – OktavaMod
Thanks very much, Michael.
I wanted to include a picture of a sagging ribbon in the “part 3” article I just posted, but I can’t find one! And I’m not about to leave one of my ribbons at gravity’s mercy for the sake of an example :-) (I’ll definitely expand on the wiring phase, though, when I get around to posting about the xfmr upgrade.)
Cheers.
My NOS R2 ribbon appears to have a lot of “sag”; how do you tighten it?
I know “carefully”, ;-D , but…
if I may ask, I’ve been searching for any details or pictures of a tranformer being replaced in a ribbon. I recently got 2 lundahl 2912’s to replace the stock transformers in my stereo fatheads. much thanks for any info.
best,
chris
does any one know if the stellar rm-1 is as good a value as the apex 205?
Thanks for your imput, I can’t wait to try this for my studio.
Just added some Coles vs Mod’d Apex 205 sound samples:
http://www.gearslutz.com/board/3775298-post170.html
I’d recommend silking inside the body screen. It’ll look cool, make the mic less wind sensitive and maintain its acoustic transparency.
Has anyone tried this mic mod recently? I did and discovered the Chinese manufacturer has completely rotated the internal components so that the transformer is now facing the front. It cannot be orientated the opposite way around as the two screws that locate the outer casing (the small one and the large knurled one) are different sizes. I recently modded a pair of 205s, including swapping in 2912 Lundahl transformers. I followed Lundahls instructions and my best knowledge for wire and pin connections and discovered these modded Apex’s had opposite polarity to all my other mics. My big question is: Were the 205s polarities inverted BEFORE the transformer mod? I had no reason to test them at that stage. When the mechanics were flipped by the manufacturer did the electronics follow, or are there loads of these Apex 205s being sold with inverted polarities? Can anyone check that?
I’ve documented this with photos, should anyone be interested.
This article was written a few years ago, but the subject is still current.
I wrote an article about modding a Cascade Fathead type lollipop ribbon mic. The modification includes transformer upgrade and 2.5-1.8-1.2 and 0.8 micron ribbons.
Check out http://riikari.fi/mark
Thanks so much for an awesome tutorial, complete with helpful photos and labels. I really appreciate your time! Looking forward to trying this mod this weekend, after having owned this mic for years.
I’m torn on the windscreens. I’ve heard on some mics (the MXL R144 and R40, I think) that the screens attached to the motor are there to dampen resonant frequencies. Others say that the inner screens are there only to protect the ribbon and the sonic character improves if you remove them.